 |
| The temple is hidden in the mountains surrounding a valley. |
Loric's temple is a 16-level dungeon on the continent of Nyuku. It's totally optional, though there is a somewhat unusual prize at the bottom. It's one of the hardest dungeons in the game, so you really need to have a hardened party to take it on. Even at level 30, I wasn't sure my party was up to it.

Level 1 starts benign enough. It's mostly what appears to be living chambers for the priests--(mostly empty) rice and sake stores, a lot of individual rooms in them with hostile Shisai in them. The northwest and northeast sections are not immediately accessible.
 |
| The acid/flame pattern on the ground is Loric's symbol. It's used a lot here. |
 |
| A nice enough greeting I guess... |

The room I entered had a bunch of acid and fire pits in them, and a lot of illusory walls around the edges, which monsters quickly gave away. Speaking of monsters, Ice Toads appear here. Ice Toads aren't particularly dangerous individually, but they appear in large numbers and have breath weapons, which can do decent damage to your whole party if you aren't lucky.
There were lots of illusory walls on this level. In fact even one led to a hint of sorts that was blocked by a false-wall tile.

The stairs to level 3 lead to a short hall, and another staircase down to level 4:

This is...obviously not the right way. It's just a section of Level 4. It's just one trap-laden hallway to a sign.
 |
| Come to think of it, last time I was Nyuku there was a hint that suggested searching the entrance of the dungeon... |
 |
| ...and directions that seem to suggest I took the wrong stairs in the lobby. |

Now I had the full extent of level 4 to explore, an it was (mostly) straightforward, though a little maze-like. And there were plenty of minotaurs there, which probably isn't a coincidence. However I couldn't find any stairs down--to get to them you have to go back up to level 3 using the staircase in the southwest.
Also something odd is that if you recall from my post where I first visited Nyuku, there was a guy that told me to look out for traps on this level. I really don't know what he was talking about--maybe the pit traps in the southeast? But it's odd, because the number on this floor pale in comparison to the those on the next area, level 3.

Despite being top-down, level 3 has shades of dungeons used in the first Wizardry and Bard's Tale II in its design. The level is divided into roughly 20 isolated buildings of a sort. Some have treasure, some have nothing, all have secret entrances of one sort or another. There are also several teleports in the middle of the level that can make it hard to map the floor accurately.
After stumbling around for a while I eventually came across the stairs down, though they were blocked by a trap.
 |
| So close, but yet out of reach... |
The stairs lead down to a hallway on level 4 that leads to the stairs to level 5.

As you can see, the layout of level 5 is one big Loric temople symbol, with its own acid and fire level. It's also one of the more straightforward levels in this dungeon. Lots of Shisai spawn here, and while they're not particularly dangerous to a party that can take on this dungeon, they cast paralysis spells a lot. That can be pretty taxing on your Shisai's MP stores. It's especially frustrating if they manage to paralyze your Shisai, because then you've got to leave the dungeon to get it cured.
Also, one thing notable about this level is that teleport-destination tile in the northwest. That's a teleport in from level 2, which is the fastest way to get down here--despite all the hidden tunnels and clues about finding the hidden entrances in the lobby, you can bypass it all entirely.
It took me a bit to find the illusory wall to the stairs down, but I eventually did. Beforehand I rested since Shigeko's MP were running low, and that tile before the stairs is a really good place to rest.
Level 6 is simple if you ignore the side rooms and chambers. Just go straight west and you can find the staircase down. There's a sneaky sign right before the exit that I think is trying to trick you into drinking the water in the pool.
 |
| One might suspect from this sign that the water might be magic pools here--but it will disease your party |
The treasure here is pretty nice though, especially considering how shallow this level is compared to the rest of the dungeon. Even at this late stage of the game, where my party mostly had the best stuff they could use, I found a Toshi Cloak, a nice piece of armor for either mage-types or monk-type characters.

There's also a hidden symbol of Loric behind an illusory wall here. One of the tiles in the center of the symbol will teleport you back up to the lobby, so it's a quick exit if you need it.

Entering this level, I found myself in a closed off room. Obviously there are some secret doors in play, so I found them quickly and entered the center chamber, a circular area with four Loric symbols in them. Each of the Loric symbols has a teleport to a different area--some on this floor, some on others. There's also a lot of illusory walls that lead to treasure, or in one case, a teleport on the east end of the level.
This teleport in particular is bugged on the Commodore 64 version of Deathlord. It sends you down to level 11. However, there's something a little weird going on when you try to get your bearings.
 |
| This is not actually level 10. |
Anyhow, back to level 7. Level 7 is another level with a crazy Shisai spawn rate, so once again, you have to look out for paralysis. In the center of the room is a trap-laden area with a few magic pools, but unless you have the Emerald Rod and/or the Ruby Ring, it's probably not worth visiting.
 |
| I did have the Emerald Rod and Ruby Ring--not that the pools did me any good. |

Level 8 is one of those "divided" levels. There's a west section and an east section. The west section you can only get in through the teleport I had just walked through. It's got some decent treasure in it, though to find your way out you need to find some secret doors. Having been used to illusory walls, it took me a little longer to find the series of secret doors I needed to use to get out. The way out was just a 1-way staircase back up to level 7.
Continuing the counterclockwise trend of entering teleports, I next tried the south teleport and ended in front of another staircase, this one leading to the northeast corner of level 8. This led to what appeared to be a dead-end, though I did find a series of secret doors leading to two signs.
 |
| The other sign says "Riches ->" |
 |
| *groan* |
Heading back the other direction, I investigated the "riches" area.
 |
There didn't appear to be anything else in this area so I started searching for secret exits and found one with a staircase down to level 9.

Level 9 is a swampy area with a river separating the level between the north and south. I came in through the north and was immediately ambushed by Ice Giants.
 |
| Quite a few Ice Giants too--the dungeon was starting to heat up. |
After taking care of the giants, there didn't appear to be any way across the river or out of the level. There's a staircase down to level 10 behind an illusory wall but I missed it. There's also a boat that I could have found had I fallen down here from a chute on level 8, but I missed that as well. To cross the river, I just relied on the UKU spell--something players that aren't using a Genkai can't do. The river was full of Whorls so I had to fight them on the way.
There wasn't much on the south bank of the river except for a dead-end hall with a sign.
 |
| ...what doors? |

Level 10 is a tomato farm. An evil tomato farm. As soon as I arrived on the level I was mobbed by a swarm of homicidal fruit.
 |
| That's a lot of tomatoes. |
Evil Tomato farming might sound like a great opportunity to grind up levels--hold down the A key with a weight, go get a sandwich and come back with enough experience for a new level. Deathlord's mechanics prevent that from working, unfortunately. The maximum number of monsters you can get "credit" for in a Deathlord fight is 32. Evil Tomatoes give 7 XP each, so that figures out to 224 XP per fight, or about 37 EXP per character--not bad, but a drop in the bucket toward what you'll need for a level at this stage of the game.
That said, the spawn rate of tomatoes was so high here that by the time I finally found the exit down, my entire party was ready for additional levels.
 |

Level 11 is the first level where I wasn't swarmed by Shisai. There were still Phantoms and Wraiths and the likes here though so I still had to look out for status ailments and paralysis. This level is notable for having four circular chambers connected by illusory walls. There's also a terrible illusory wall maze here that I managed to avoid. I did, however, get caught in a teleport that sent me back up to level 7, in the middle of another illusory wall maze.
 |
| The wall maze led to this donations jar. Strange place to put it... |

Level 12 was just a small chamber with a Loric symbol in it. Searching the walls I found some secret doors which led to a branching pathway. I took the one on the right and found a hall laden with hazards.
 |
| Of course there are secrets and treasure behind a lot of these hazard tiles... |
 |
| Strange how pots always have the biggest payouts, even though they're the one "chest" type without traps. |

This is where things get a little interesting. Levels 13-15 of Loric's temple are each divided in two. One half you can only get to on the way down to level 16, and the other half you can only get to on the way back up. (teleport magic can always bypass this, of course)
Level 13-part-1 is fairly simple and straightforward, and the spawn rate isn't too high. However what does spawn here is tough. Beholders, Undead Ronin, Purple Worms, Mist Dragons, Vampires, and Golems all spawn here. On this level alone I lost a few characters before reaching the stairs down, so Shigeko had to resurrect them and then rest up a bit--the stairs down led to a safe 2x2 enclosed room.


The first part of Level 15 isn't particularly complicated either. It's got exits on each side that let you "wrap around" to the opposite side, kind of like a Pac-man board. There are lots of empty rooms and halls, but none of them lead directly to stairs so you have to resort to searching for secret doors.
 |
| What is it with old RPGs and referential humor? |

The lowest level of Loric's temple is interesting. You start at the south end of the level, in between two walled-off areas, one with a staircase up and one with a chest. There's a teleport to that staircase on this level, but there's no way into that room with the chest outside the use of teleport magic. However, if you do get in there, it's a very unusual--and valuable--treasure.
 |
| Yes, this is the same as the Ruby Ring in the Red Shogun's citadel. |
Teleporting out of the chest area with UGOKU, I started exploring the level. Level 16 is deadly. Not only do the toughest monsters in the game spawn here, but it's full of traps. The acid and fire is easily enough to navigate; it's the pit traps that are so bad. They're hard for all but your highest-INT characters to find, and when you fall in they do upwards of 40 damage to the whole party. What's worse, you have about a 50-50 chance to fall back in when climbing out.
There are also several teleport traps on the level. The main treasure chamber is at the very north end of the level, but it's blocked by 3 teleport traps that send you to various places on the level. One of which is the exit up--if you run into that trap before getting into the treasure chamber, you either have to teleport out or redo the whole dungeon to get back down. The only way in to the treasure chamber is to approach from the east, through the flames. Inside are two coffins and a bunch of chests. One of the coffins houses Loric himself.
 |
| Even with a YUREI spell in advance he gets the first shot. Guess he's always hostile no matter what. |
I lucked out and managed to do in Loric without any deaths; by having my casters buff the party and the front line attack, he only lasted a couple of rounds. I was fortunate in that he neither cast his ultimate attack spell, his mass-death spell, and that he didn't get any level drains.
Loric's loot was substantial, and I got a bunch of really nice items--I didn't need any of them, but there was some top-class equipment in them. After cleaning out Loric's hoard, I teleported to the exit of the level.
 |
| I have no idea what this means. |
Despite the lethality of the monsters on this level, they can't spawn in this little room so it's a perfectly safe place to rest. I used the opportunity to heal up my characters.
 |
| Not pictured: another Purple Worm and Undead Ronin group |

Level 15-2 is a wide-open level; you start in the south and the only thing you need to discover are the illusory walls to be let out into the rest of the level.
Monsters here are no joke. Upon coming up here I was ambushed by, in quick succession, groups of 1 Lich, 3 Mist Dragons, 3 Undead Ronins, 2 Beholders, 2 Banshees, and 1 Golems, I suspect the issue is less that the spawn rate is really high, and more that all those monsters spawned while I was resting before visiting Level 16. Even though I was on the other "half" of the level, so to speak, it didn't stop monsters from spawning there.
 |
| Note how much my party's been pulled down from what was full strength just a moment ago. |

You start this level in the center north, among the pit traps (which are quite deadly) but once you find the illusory wall out, you're put in a series of spiral hallways that you have to go through--and fight anything that's in your way, as there are no potential escape routes.
This level was brutal on my party. There was a nonstop procession of difficult monsters, and Liches and Beholders in particular slaughtered my characters over and over with death spells. Miraculously Shigeko was never killed so she could just revive them, but as a result I had to fight through this level mostly magic-free as all my casters lost their MP upon revival. I did learn here though that so long as someone participates in a battle, they still get experience even if they leave the battle dead, as Shuten's corpse got a "level up" plus beside it after an unlucky battle with some Liches.
At this point I was starting to get tempted to just teleport out, as I was running very low on food and seemingly needed to rest every level. I did rest up to close to full strength before the stairs up to level 13.

Level 13 is...weird. It's the "Chaos" level, with tiles seemingly randomly strewn about the place. It's a decent place to rest compared to some other levels because of the weird layout that prevents monsters from finding you. The enemies that show up here are the same as the powerful ones from the lower levels, with the addition of Sea Dragons, which can spawn in the water.
 |
| That sign is unreadable without use of the UNPAN spell. |
I made my way through the level as fast as I could, and just got enough experience for my whole party to go up a level before I reached the stairs. They took me to a small chamber on level 12. From there I was where I had been before--rather than try to go the long way back out I just teleported out.
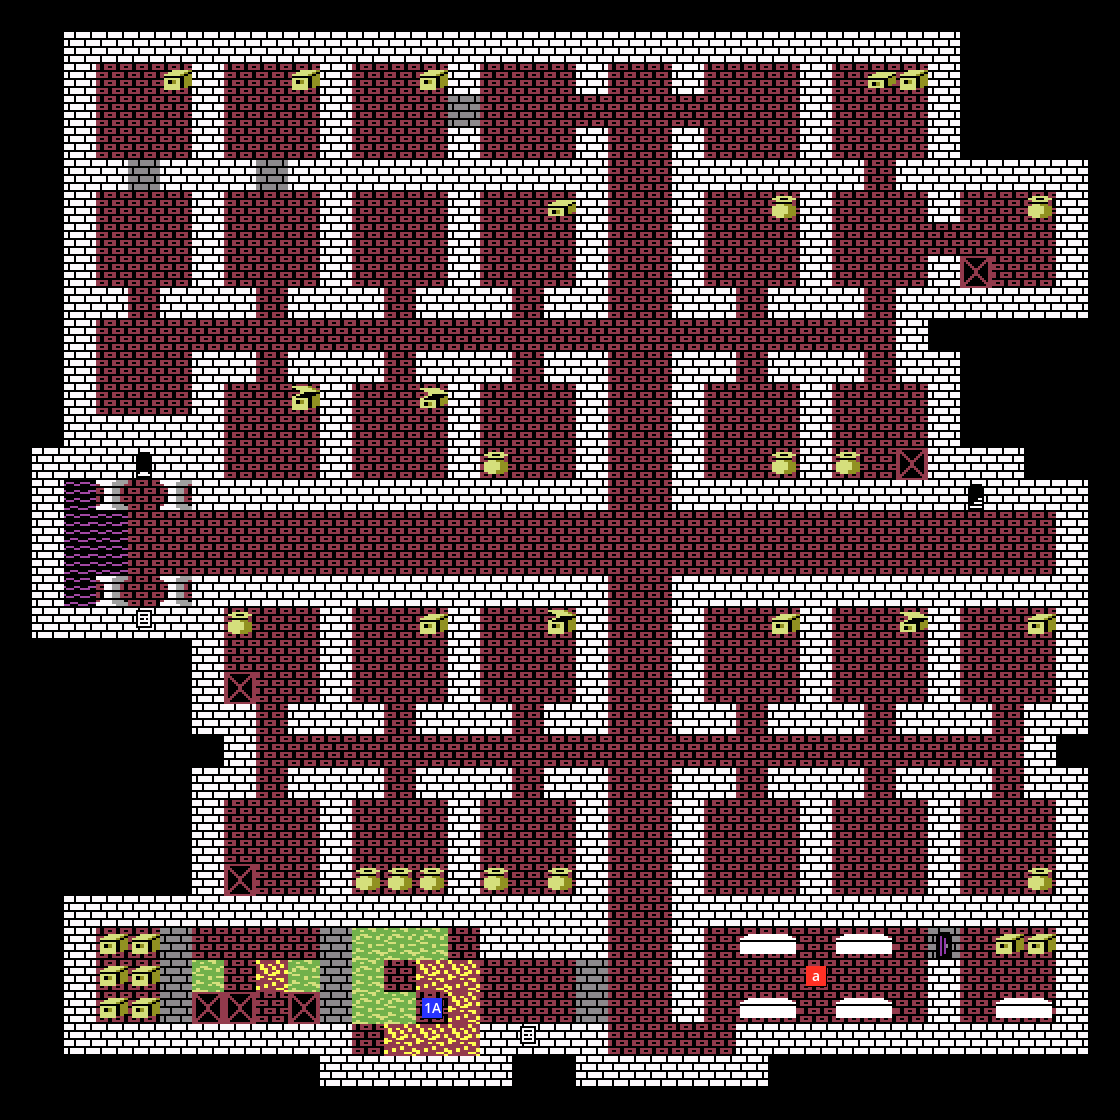
That about covers the Temple of Loric. Looking back, there was one area I neglected to cover--the Treasury and Pits which encompass the southeast part of levels 8 and 9--they're fairly self-explanatory if you look at the maps.
I actually kind of like the Temple of Loric, despite it being full of tedium and sadism--it's a really good way to make an involved "challenge" dungeon. I also like the fact that unlike most of the other optional dungeons in Deathlord, there's a real reward for completing it--another Ruby Ring at the bottom. In too many of the dungeons there's nothing but gold, with no other reason to go in other than for challenging yourself.
There's only one more place for me to go at this point--the Deathlord's island itself. It's a very large and dangerous area, and I think my party might be slightly underleveled at 33 at this point--but it's pretty close. Next time I'll cover that island, and hopefully finish the game entirely while I'm at it!


No comments:
Post a Comment