Tokushima is basically just a village. There's not much here at first glance. There's an armor shop, a shield shop (I buy one for anybody that can use one) a healer, and a place to restock food. Other than that there are just a bunch of small locked houses. Some of them have some hostile residents. One in particular has some angry peasants that attack; upon killing them I find a back door into the storehouse of the grocery:
 |
| Chests behind stores usually contain their wares, so most of these pots have food. |
So next I'm moving on to Yokahama to the southwest and see if Senju left any traces there.

Yokahama has been completely destroyed; apparently it's been invaded by an army of skeletons, which is still there and attacks me every couple of steps. In the center of the city I get in a fight with vipers and Shuten and Gio get poisoned, forcing me to hoof it back to Tokushima for a cure.
It's hard to find anything in here that doesn't want to kill you, but in one building I find a Yakuza hiding out:
 |
| Tough break... |
Besides this, there's not much to find here. The tax vault has been looted but there are three untouched treasure chests in the weaponsmith and armory. The chest in the armory gives a random piece of equipment--in this case, a Hara-Ate, which I didn't need so left behind. Also, if you visit Senju's house in the northwest, you can find the remains of a huge magical explosion--kind of a neat touch. He put up a fight on his way out.
By the time I leave I've gained nearly 200 XP per character on skeleton fights alone and am thoroughly ready to get out of here and not come back.
The only new place left on Kodan now is Wakiza, but there are a few places in Kawa I skipped the first time around that need revisiting. First is the Daimyo's place. The Daimyo is tough but at level 3 my party might be able to take him.
 |
| Or maybe not... |
Now I have to head to the palace to resurrect Shuten. On the way out I loot the Diamyo's treasure stores. The guards still don't come after me so I'm starting to think I'm remembering incorrectly and town looting is OK.
There are two options for a dead character: Raising for 300 and Resurrection for 500. Never, ever, go the cheap route--always pay the full 500. True to its AD&D 1E influence, any character in Deathlord that's Raised loses a point of CON permanently, and you don't want that.
There's still one more place in Kawa I wanted to check out, so after Resurrecting Shuten I head back. On the way a group of skeletons puts Shuten over the top for a level (again, it looks like 200 was the magic number of XP this time)
You might recall that a townsperson earlier mentioned that "The Yakuza of Kawa are famous." Well, there's a hidden guild of them there. There's a secret door in the middle of the long north-west corridor on the west side of town where you can find the entrance:
 |
| Unless you search every single square, this is hard to find |
 |
| The official guide book suggests in its story go here before you go anywhere else--which is crazy. |
For those counting, that's 8 Yakuza groups, 3 Ninja groups, and 2 Ansatsusha groups, all hostile. They're not the only ones down here but to even get any further you have to kill them all. The Yakuza aren't that big a deal--the danger is the Ansatsusha and especially the Ninja in particular. Ninjas get three attacks per round, with each having a 50% chance to outright kill the target. Fighting a group of one or two is an OK risk--but one of these groups had 7, so I used spells to escape. The Ansatsusha also have multiple attacks, and they don't insta-kill but poison instead. By the time I'm done this fight all three of my front-liners are poisoned, so it's back to the palace to detoxify them all. Also everyone's ready to go up a level, so I go for training too.
Back to theThievesYakuza Guild I get ambushed by a few more enemies before reaching the chambers of the guildmaster. The guildmaster is a tough cookie but I think I can take him:
Master Ninjas are very, very tough. They're near-endgame level; have very good AC, multiple attacks that hit hard, and can randomly insta-kill or poison with their attacks. But there's only one of him, and now that Tomoe is level 4, casting Todo does a double-attack that never misses so I have a good way to consistently damage him, and I have three casters that can cast AC-augmenting spells so I can hopefully keep the front rank alive. On that rationale, I decide to take him on.
Well, I somehow managed to beat him but that sure as hell wasn't worth it. Being the only survivors Tomoe and Frank got a nice XP boost but that's it--no gold, no treasure, nothing. 2150 gold in resurrections and detoxifications down the drain.
Only one place I haven't visited yet on Kodan, and that's the ruined city of Wakiza, which is on the south side of the continent. I run into a sign on the way there that talks about it:
However we won't be searching for that pirate gold any time soon, though there is quite a lot of it. Further south is Wakiza proper:

As you can see from the map, most of Wakiza is only accessible via boat. There are, in fact, a few people we can talk to, though the one on the island we can't get to at the moment. The Shukenja on the southwest we can pay off for a tip on the pirates though:
Back to the
 |
| There's only one of him, but he's very hard |
 |
| Boy, was that ever a bad idea... |
Only one place I haven't visited yet on Kodan, and that's the ruined city of Wakiza, which is on the south side of the continent. I run into a sign on the way there that talks about it:
 |
| Sounds promising... |

As you can see from the map, most of Wakiza is only accessible via boat. There are, in fact, a few people we can talk to, though the one on the island we can't get to at the moment. The Shukenja on the southwest we can pay off for a tip on the pirates though:
 |
| I could have surmised that from the signpost on the way here... |
Strangely enough, as you can see from the map, this Shukenja is blocking a secret tunnel into a room full of treasure. He doesn't move, so the only way you'd possibly find it is if you decided to kill him for some reason. I could easily kill him, but there's not that much treasure and I don't particularly feel like spending the effort. As Wakiza counts as a "town" killing him might spawn guards. Probably not but better safe than sorry.
As for the pirate caves, they are hidden behind a secret passage in the northeast quadrant of the ruins, though you have to either walk through swamp or take a boat to get there. I'm not going in now though. The pirates' den is a completely optional dungeon, and it's also one of the hardest and most frustrating in the game. I'll show it off at some point but attempting to clear it out now would be suicide.
So with that, Kodan is pretty much wrapped up for now; the only thing left is to finish our first quest proper and hunt down Kawahara in the caverns below the palace. This is a significant undertaking, though, and I'm not likely to be able to do the dungeon in one shot.
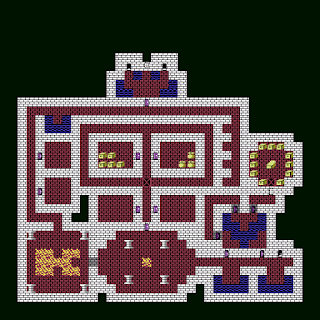
I head to the palace and descend to the first level of the dungeon:

I actually like Kawahara's dungeon a lot. It's tricky and confusing at times, but it's well designed and well balanced compared to a lot of dungeons in the game. The north half is basically the palace basement. There are some storerooms that seem thoroughly looted and an opening into a natural cavern. It looks pretty much empty until you discover an illusionary wall in the cavern, which leads to the entrance of Kawahara's domain proper.
 |
| The"true" entrance to this dungeon |
Smashing down the door, the party is immediately attacked by a guy with a sword and shield called a "Kaibu." I think this is a cut off name of "Kaibutsu" which means "monster." So basically one of the most generic monsters you can think of. I'm guessing this might have been an Orc prior to Japan-ifying this game. Kaibu aren't particularly dangerous but there are quite a lot of them.
Walking down a hallway, I fall into a pit trap:
 |
| Oops. |
Pit traps are annoying. You have to fall into them; even if you search the area and discover them in advance, you'll still have to climb down in to get by them in a lot of cases. If you don't discover them in advance, like I did this time, your party will take a modest amount of damage falling in. What's worse, there's a chance you'll slip and fall climbing out, damaging your party again. But for the most part these pits are more of a nuisance than a real threat.
The corridor south from the pit is one of the first obstacles in this dungeon that's tricky. It seems like an endless corridor, but it's not. About halfway down the corridor, there's a teleport trap that will teleport you one space north. If you keep going south you'll be teleported over and over. The trick is that there is no visual indication that you've been teleported other than your surroundings immediately changing. Games like Bard's Tale had the screen "blink" for a split second but Deathlord has no such telltale signs. If you get teleported into an area that looks identical to the one you came from, like here, there's no way to tell that you've moved.
The secret is to search the east wall. There's a series of two secret doors there that will allow you to bypass the teleport trap:
 |
| That one tile between the doors is the teleport trap |
This particular trick is employed a lot in Deathlord. Here it's not that bad--in other areas, it's enormously frustrating. There's no way in the game to tell where your relative position in a dungeon is outside of the ICHIHAN spell, which merely tells you what floor you're on. Teleports like this can get downright sadistic at times.
The rest of this floor is a straight corridor to the stairs down, punctuated by locked rooms full of easily dispatched Kaibu, so it's down to the next floor.
Like the first floor, at first glance the second floor appears to be a dead end. There are some locked doors, behind one of which is a small treasure chamber and the other a room with some empty pots and zombies. To go onwards, you need to find the secret doors to the way below. There two sets here. The first is a series of secret doors in the southeast area around a stream of sorts, leading to a hidden treasure chamber:
There's a gate to smash down and a pit trap to deal with before you can get to the treasure. The amount inside each chest is relatively small, but I found a pair of gloves which I gave to Tomoe--gloves are one of the few pieces of supplemental armor that Mahotsukai and Genkai can use.
The second, and more important, secret door is an illusionary wall in the west side of the big pillared chamber with a lava pool at the south side of the level. Beyond this wall there's a veritable onslaught of monsters--skeletons, zombies, ogres, stonebrows, and hobakes (obake=Deathlord goblin so hobake=Deathlord hobgoblin I think) before I get to the way down. And on this level, there are two separate exits, one to the left and one to the right. Between them is a sign:
However at this point several characters have exceeded the magic 200 XP again (at what point will it start costing more to raise levels?) so it's back to the surface to train. Next post I'll finish exploring the dungeon and the game world will open up substantially from there.
The rest of this floor is a straight corridor to the stairs down, punctuated by locked rooms full of easily dispatched Kaibu, so it's down to the next floor.

 |
| Despite that coffin's ominous appearance, there was no undead monster inside it. |
The second, and more important, secret door is an illusionary wall in the west side of the big pillared chamber with a lava pool at the south side of the level. Beyond this wall there's a veritable onslaught of monsters--skeletons, zombies, ogres, stonebrows, and hobakes (obake=Deathlord goblin so hobake=Deathlord hobgoblin I think) before I get to the way down. And on this level, there are two separate exits, one to the left and one to the right. Between them is a sign:
 |
| There isn't anywhere in the game prior you can get a hint as to which is correct--it's just a guess on the player's part |


No comments:
Post a Comment